
Introduction
If you own a travel trailer, you know that winterizing your RV is an important part of maintaining it. But when the warmer months arrive, it’s time to de-winterize your RV to get it ready for the upcoming camping season. De-winterizing your travel trailer is a process of reversing the steps taken to winterize it, such as removing the winter cover, disconnecting the water supply, and lubricating moving parts. It’s also a good opportunity to check for any damage or potential repairs that may be needed.
This article will provide a step-by-step guide to de-winterizing your travel trailer, as well as tips for preparing your RV for spring, cleaning and inspecting it after winter, and essential maintenance tasks to get your RV ready for summer. With these steps, you can ensure that your travel trailer is in top condition for the upcoming camping season.
Step-by-Step Guide to De-Winterizing a Travel Trailer
De-winterizing your travel trailer is a detailed process, but it doesn’t have to be overwhelming. Here are the steps you need to take to get your RV ready for the upcoming camping season:
1. Remove Winter Cover
The first step in de-winterizing your travel trailer is to remove the winter cover. Make sure to inspect the cover for any signs of wear and tear and replace it if necessary. Once the cover is off, inspect the exterior of your RV for any damage that may have occurred over the winter.
2. Check for Damage
Once the winter cover is off, inspect the exterior of your RV for any damage that may have occurred over the winter. Look for cracks, holes, or other signs of wear and tear. If you find any damage, make sure to repair it before proceeding with the de-winterization process.
3. Disconnect Water Supply
Before you start the de-winterization process, make sure to disconnect the water supply from your RV. This will ensure that no water is left in the pipes or tanks, which could lead to leaks or other problems.
4. Drain and Flush Fresh Water Tank
Once the water supply is disconnected, you can drain and flush the fresh water tank. This will help remove any sediment or debris that has built up over the winter months. To do this, you can use a pump or a garden hose.
5. Replace Filters
Once the tank is flushed, replace the filters. This will help ensure that your water is clean and free of contaminants. Depending on the type of filter you have, you may need to replace it every few months.
6. Reinstall Water Heater
If you removed the water heater during the winterization process, now is the time to reinstall it. Make sure to follow the manufacturer’s instructions for proper installation and safety.
7. Inspect Tires and Axles
Take a close look at your tires and axles for any signs of wear and tear. Make sure to inflate your tires to the recommended pressure level and check the brakes and wheel bearings for any signs of damage.
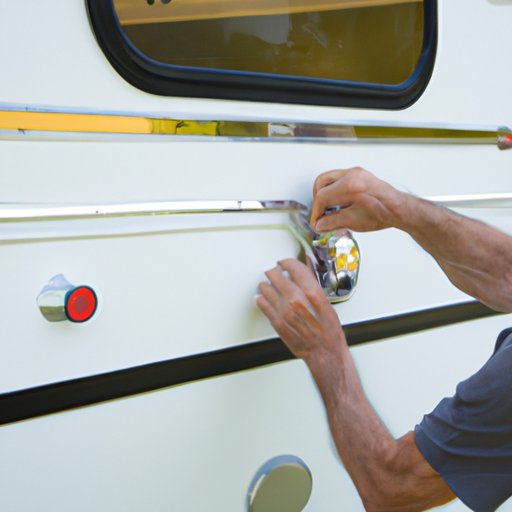
8. Lubricate Moving Parts
Lubricate any moving parts, such as the door hinges, locks, and latches. This will help prevent rust and corrosion, and keep your RV running smoothly.
9. Reinstall Batteries
If you removed the batteries during the winterization process, now is the time to reinstall them. Make sure to charge them fully before using them.
10. Test Electrical System
Once the batteries are reinstalled, test the electrical system to make sure it is functioning properly. This includes checking the lights, outlets, and other electrical components. If any repairs are needed, make sure to take care of them before continuing with the de-winterization process.
11. Clean Exterior
Now that all the mechanical components have been checked and repaired, it’s time to clean the exterior of your RV. Use a mild soap and water solution to remove any dirt or grime that may have accumulated over the winter months.
12. Sanitize Interior
Finally, sanitize the interior of your RV to get rid of any germs and bacteria. Use a disinfectant spray or wipes to wipe down surfaces and fabrics, and vacuum carpets and upholstery.

Preparing Your Travel Trailer for Spring: A Checklist
Once you’ve completed the steps outlined above, you’ll want to make sure that your travel trailer is prepared for the upcoming camping season. Here is a checklist of items to inspect and repair before taking your RV out on the road:
1. Check Tires and Axles
Inspect the tires and axles for any signs of wear and tear. Make sure to inflate the tires to the recommended pressure level, and check the brakes and wheel bearings for any signs of damage.
2. Check Electrical System
Test the electrical system to make sure it is functioning properly. This includes checking the lights, outlets, and other electrical components. If any repairs are needed, make sure to take care of them before continuing.
3. Check Plumbing System
Check the plumbing system for any leaks or clogs. Make sure to replace any worn or damaged parts, and check the connections for any signs of corrosion.
4. Check Appliances
Inspect all appliances for any signs of wear and tear. Make sure to clean out any lint or dust from the vents, and check the seals and gaskets for any signs of damage.
5. Check Seals and Gaskets
Make sure that all seals and gaskets are in good condition. If any are worn or damaged, replace them immediately.
6. Check Awnings
Inspect the awnings for any signs of wear and tear. Make sure to lubricate the moving parts, and replace any broken or missing parts.
7. Check Interior Furnishings
Finally, inspect the interior furnishings for any signs of wear and tear. Make sure to clean and sanitize any fabrics or carpets, and replace any broken or missing parts.

Tips for Releasing Your Travel Trailer from Winter Storage
Releasing your travel trailer from winter storage can be a daunting task. Here are some tips to help make the process easier:
1. Check Campground Rules
Before releasing your travel trailer from winter storage, make sure to check the rules and regulations of the campground where you plan to stay. Some campgrounds may require that you have a reservation before arriving, while others may have specific rules about noise levels or other activities.
2. Make Sure You Have All Necessary Supplies
Make sure you have all the necessary supplies for your trip, such as food, water, fuel, and any other items you may need. If you don’t have them already, make sure to pick them up before leaving.
3. Make Any Necessary Repairs
Before releasing your travel trailer from winter storage, make sure to inspect it for any repairs that may be needed. This includes checking the tires, brakes, electrical system, and other components.
4. Disconnect Electricity and Water
Make sure to disconnect the electricity and water supply before releasing your travel trailer from winter storage. This will help prevent any damage or leaks that may occur while you’re away.
5. Check Your Hitch
Before leaving, make sure to check the hitch and other towing components for any signs of wear and tear. Make sure to replace any worn or damaged parts before departing.
6. Securely Stow Items
Make sure to securely stow any items you may be bringing with you on your trip. This includes food, clothing, camping gear, and any other items you may need for your journey.
7. Drive Carefully
Finally, make sure to drive carefully when releasing your travel trailer from winter storage. Be aware of your surroundings and obey all traffic laws. This will help ensure a safe and enjoyable trip.
How to Clean and Inspect Your Travel Trailer After Winter
After releasing your travel trailer from winter storage, it is important to clean and inspect it to make sure everything is in working order. Here are the steps you should take to clean and inspect your RV after winter:
1. Clean Out Debris
The first step is to clean out any debris that may have accumulated over the winter months. Use a broom or vacuum to remove any leaves, twigs, or other debris from the interior and exterior of your RV.
2. Clean Windows and Mirrors
Clean the windows and mirrors to remove any dirt or grime that may have built up over the winter months. Use a mild soap and water solution and a soft cloth to avoid scratching the glass.
3. Vacuum and Dust
Vacuum and dust the interior of your RV to remove any dirt or dust that may have accumulated over the winter months. Make sure to use a soft brush attachment so as not to scratch any surfaces.
4. Wash Exterior
Use a mild soap and water solution to wash the exterior of your RV. Make sure to rinse thoroughly and dry completely to avoid water spots.
5. Clean Deck or Patio
If your RV has a deck or patio, make sure to clean it as well. Use a mild soap and water solution, and scrub any stubborn stains with a brush.
6. Inspect Roof
Inspect the roof of your RV for any signs of wear and tear. Look for any cracks, holes, or other damage and make sure to repair them before continuing.
7. Inspect Seams, Seals, and Gaskets
Inspect all seams, seals, and gaskets for any signs of wear and tear. Make sure to replace any worn or damaged parts.
8. Inspect Lights and Electrical Connections
Test the lights and electrical connections to make sure they are functioning properly. Make sure to replace any broken or worn parts.
9. Check LP Gas Lines and Connections
Check the LP gas lines and connections for any signs of wear and tear. Make sure to replace any broken or worn parts.
Essential Maintenance Tasks to Get Your Travel Trailer Ready for Summer
To ensure that your travel trailer is in top condition for the upcoming camping season, make sure to perform the following maintenance tasks:
1. Change Oil and Filter
Change the oil and filter according to the manufacturer’s recommendations. This will help keep your RV running smoothly and efficiently.
2. Change Air Filter
Change the air filter to help keep your engine running smoothly. This should be done according to the manufacturer’s recommendations.
3. Grease Moving Parts
Grease any moving parts, such as the door hinges, locks, and latches. This will help prevent rust and corrosion, and keep your RV running smoothly.
4. Inspect Brakes
Inspect the brakes for any signs of wear and tear. Make sure to replace any worn or damaged parts.
5. Check Propane Levels
Check the propane levels to make sure you have enough for your trip. Make sure to refill the tank if needed.
6. Check Battery Levels
Check the battery levels to make sure they are charged and ready to go. If needed, recharge the batteries before your trip.
7. Inspect Sewer Hoses
Inspect the sewer hoses for any signs of wear and tear. Make sure to replace any worn or damaged parts.
8. Check Wheel Bearings
Check the wheel bearings for any signs of wear and tear. Make sure to replace any worn or damaged parts.
9. Inspect Door and Window Seals
Inspect the door and window seals for any signs of wear and tear. Make sure to replace any worn or damaged parts.
Conclusion
De-winterizing your travel trailer is an important step in maintaining your RV for the upcoming camping season. By following the steps outlined in this article, you can ensure that your travel trailer is in top condition and ready for the open road. From removing the winter cover and checking for damage to inspecting the tires and axles and cleaning the exterior, these steps will help you get your RV ready for the upcoming camping season.
(Note: Is this article not meeting your expectations? Do you have knowledge or insights to share? Unlock new opportunities and expand your reach by joining our authors team. Click Registration to join us and share your expertise with our readers.)