Introduction
The ability to listen to music is one of the most popular features of the iPhone. Whether you prefer classic rock, rap, country, or anything else, there are plenty of ways to get your favorite tunes on your device. But for those who are new to downloading music onto their iPhones, the process can seem daunting. This article will provide a comprehensive guide on how to download music onto an iPhone, from signing up for Apple Music to using a file manager app.

Use Apple Music to Download Songs
Apple Music is Apple’s streaming service and digital music store. It offers access to over 60 million songs, as well as curated playlists and personalized radio stations. To get started with Apple Music, you’ll need to sign up for an account.
Signing Up for an Apple Music Account
To sign up for Apple Music, go to the App Store on your iPhone and search for “Apple Music.” Once you’ve found the app, download it and open it. From there, you’ll be prompted to sign in with your Apple ID or create a new one. After that, you’ll be asked to choose a subscription plan; the individual plan costs $9.99 per month, while the family plan costs $14.99 per month and allows up to six people to use the service. Once you’ve selected a plan, you’re ready to start searching and downloading music.
Searching and Downloading Music
Once you’ve signed up for an Apple Music account, you can begin searching for and downloading music. To do this, simply open the Apple Music app and type the name of the artist, album, or song you want into the search bar. You’ll then be presented with a list of results, which you can filter by genre and other criteria. When you’ve found the song you want, tap the plus icon next to it to add it to your library. The song will then start downloading and will be available to play in the Apple Music app.
Stream Music from Third-Party Sites
In addition to Apple Music, there are many third-party sites that offer streaming music. These sites often have a wider selection than Apple Music, so they can be a great option if you’re looking for something specific. However, before you can stream music from these sites, you’ll need to find one that is compatible with your iPhone.
Finding Compatible Sites
When looking for a third-party site to stream music from, make sure to check if it is compatible with your iPhone. Some sites may require you to download an app, while others may work directly in your browser. Additionally, some sites may only be compatible with certain versions of iOS, so make sure to check the system requirements before signing up.
Connecting to the Site
Once you’ve found a compatible site, you’ll need to connect to it. Depending on the site, this may involve downloading an app or visiting the website in your browser. Once you’re connected, you’ll be able to browse the site’s library of music and create playlists.
Streaming Music
Once you’ve found the music you want, you can stream it directly from the site. Some sites may allow you to download the music for offline listening, while others may only allow you to stream it. Additionally, some sites may limit the number of times you can stream a song, so make sure to check the terms and conditions before you start listening.
Transfer Music from a Computer to an iPhone
If you already have music stored on your computer, you can transfer it to your iPhone. To do this, you’ll need to connect your iPhone to your computer and use iTunes to transfer the music files.
Connecting Your iPhone to Your Computer
Before you can transfer music from your computer to your iPhone, you’ll need to connect them. To do this, use the USB cable that came with your iPhone to connect it to your computer. Once the devices are connected, you should see a prompt on your iPhone asking if you trust the computer; tap “Trust” to continue.
Using iTunes to Transfer Music
Once your iPhone is connected to your computer, open iTunes. Click the “File” menu, then select “Add File to Library” to select the music files you want to transfer. Once the files have been added to your iTunes library, click the “Devices” menu and select your iPhone. Then, select the music files you want to transfer and click “Sync” to transfer them to your iPhone.
Buy Music from iTunes
If you don’t already have music stored on your computer, you can buy it directly from iTunes. iTunes offers access to millions of songs, albums, and playlists, as well as exclusive content and deals. To purchase music from iTunes, you’ll need to create an Apple ID and link a payment method.
Purchasing Music with iTunes
To purchase music from iTunes, open the iTunes Store on your iPhone and browse or search for the music you want. When you’ve found the song or album you want, tap the price button to purchase it. You’ll then be asked to confirm your purchase; once you’ve done so, the music will start downloading and will be available to play in the iTunes app.
Downloading Music from iTunes
Once you’ve purchased music from iTunes, you can download it to your iPhone. To do this, open the iTunes app and select the music you want to download. Then, tap the cloud icon next to the song to start the download. The song will then be available to play in the iTunes app.

Sync with iCloud Music Library
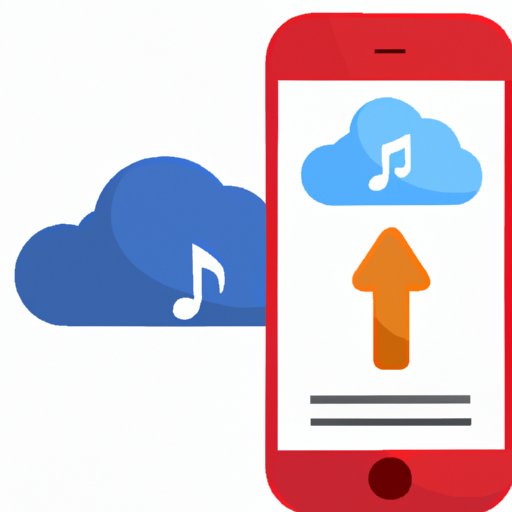
iCloud Music Library is Apple’s cloud-based music storage service. It allows you to sync your music across all of your devices, so you can access your library from any device with an internet connection. To use iCloud Music Library, you’ll need to set it up on your iPhone.
Setting up iCloud Music Library
To set up iCloud Music Library, open the Settings app on your iPhone and tap “Music.” Then, toggle the “iCloud Music Library” switch to the “On” position. You’ll then be asked to choose between merging your existing music library with iCloud or replacing it; select the option that best suits your needs. Once iCloud Music Library is enabled, your music will start syncing to the cloud.
Syncing Music with iCloud
Once iCloud Music Library is enabled, you can start syncing your music. To do this, open the Music app on your iPhone and select the music you want to sync. Then, tap the iCloud icon next to the song to start the sync. The song will then be available to play in the Music app, regardless of which device you’re using.

Use Family Sharing to Share Music
Family Sharing is Apple’s feature that allows up to six family members to share purchases from the App Store, iTunes Store, and Apple Books. It also allows you to share music, so you can access each other’s libraries without having to purchase the same songs multiple times.
Setting up Family Sharing
To set up Family Sharing, open the Settings app on your iPhone and tap “iTunes & App Store.” Then, tap your Apple ID and select “Set Up Family Sharing.” You’ll then be asked to enter the Apple IDs of the people you want to add to your family group. Once you’ve added everyone, you’ll be able to access their purchases and music.
Accessing Shared Music
Once you’ve set up Family Sharing, you can access the music shared by other members of your family group. To do this, open the Music app on your iPhone and tap the “For You” tab. Then, select the person whose music you want to access. You’ll then be able to browse their music library and play any songs you want.
Use a File Manager App to Download Music
In addition to the methods mentioned above, you can also download music to your iPhone using a file manager app. These apps allow you to download music files directly to your device, giving you access to music even when you don’t have an internet connection.
Finding a Compatible App
When looking for a file manager app, make sure to check if it is compatible with your iPhone. Some apps may require you to download additional software, while others may work directly on your device. Additionally, some apps may only be compatible with certain versions of iOS, so make sure to check the system requirements before downloading.
Downloading Music with the App
Once you’ve found a compatible app, you can start downloading music. To do this, open the app and search for the music you want. When you’ve found the song you want, tap the download button to begin the download. Once the download is complete, the song will be available to play in the app.
Conclusion
Downloading music onto an iPhone is a relatively easy process. Whether you use Apple Music, a third-party site, iTunes, iCloud Music Library, Family Sharing, or a file manager app, you can quickly and easily get your favorite songs on your device. With this guide, you now have all the information you need to start downloading music to your iPhone.
Summary of Steps
To download music onto an iPhone, you can use Apple Music, a third-party streaming site, iTunes, iCloud Music Library, Family Sharing, or a file manager app. Each method has its own advantages and disadvantages, so make sure to research them before choosing one.
Benefits of Downloading Music
By downloading music to your iPhone, you gain access to your favorite songs anytime, anywhere. Additionally, it allows you to access your music library even when you don’t have an internet connection, making it ideal for long trips or areas with poor reception.
(Note: Is this article not meeting your expectations? Do you have knowledge or insights to share? Unlock new opportunities and expand your reach by joining our authors team. Click Registration to join us and share your expertise with our readers.)
