Introduction
Downloading music onto your Macbook can be a daunting task if you’re not familiar with the process. This article will provide users with a step-by-step guide to successfully download music onto their Macbook. It will cover topics such as using the iTunes Store, downloading from streaming services, connecting external hard drives or USB flash drives, transferring music from CDs, and finding music from legal online sources.
Using iTunes Store
The iTunes Store is one of the most popular methods for downloading music onto your Macbook. To get started, you’ll need to create an Apple ID by signing up on the iTunes Store website. Once your account is set up, you can purchase music from the iTunes Store and add it to your library. Here’s how to do it:
Creating an Apple ID
The first step is to create an Apple ID. To do this, go to the iTunes Store website and click “Sign Up”. You’ll then need to enter your name, email address, and password. Once your account is created, you can log in to the iTunes Store with your Apple ID.
Purchasing Music from the iTunes Store
Once you’ve logged in to the iTunes Store, you can start browsing for music. When you find a song or album that you want to purchase, click the “Buy” button. You’ll then be prompted to enter your payment information. Once your payment has been processed, the music will be added to your library.
Adding Music to Your Library
After you’ve purchased music from the iTunes Store, it will be added to your library. To access your library, click the “My Music” tab at the top of the iTunes Store page. Here, you can view all the music that you’ve purchased from the iTunes Store. To download a song or album, simply click the “Download” button next to the item.
Downloading from Streaming Services
Another popular method for downloading music onto your Macbook is through streaming services. Many streaming services allow you to download songs and albums for offline listening. Here’s how to do it:
Signing Up for a Service
The first step is to sign up for a streaming service. Popular options include Spotify, Apple Music, and Tidal. To sign up, simply visit the website of the service you’d like to use and follow the instructions to create an account.
Finding and Downloading Music
Once you’ve created an account, you can start searching for music. To do this, simply type the name of the artist, song, or album you’re looking for into the search bar. When you find what you’re looking for, click the “Download” button. The song or album will then be downloaded and added to your library.
Syncing Music to Your Device
In order to listen to the music you’ve downloaded, you’ll need to sync it to your device. To do this, open the streaming service’s app on your Macbook and select the “Sync” option. Then, select the songs or albums you’d like to sync and click “Sync Now”. The music will then be synced to your device and you’ll be able to listen to it anytime, even without an internet connection.

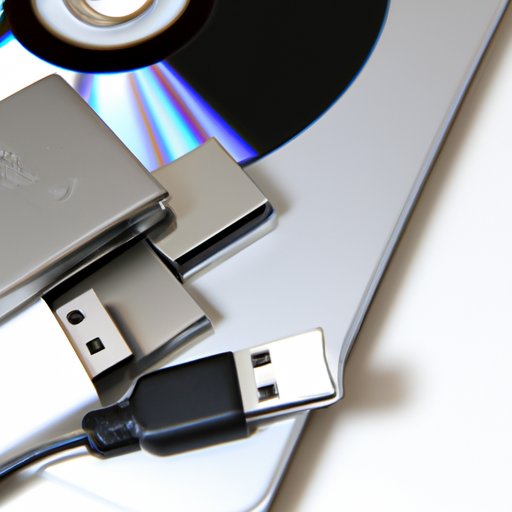
Using External Hard Drives or USB Flash Drives
You can also download music onto your Macbook using an external hard drive or USB flash drive. Here’s how to do it:
Transferring Files from Your Computer to a USB/External Hard Drive
First, you’ll need to transfer the music files from your computer to the external hard drive or USB flash drive. To do this, connect the external device to your computer and copy the music files from your computer to the device. Once the files have been transferred, you can disconnect the device from your computer.
Connecting the USB/External Hard Drive to Your Macbook
Next, you’ll need to connect the external device to your Macbook. To do this, plug the device into one of the USB ports on your Macbook. Once the device is connected, you should see a pop-up window asking if you’d like to open the device.
Copying Music from the USB/External Hard Drive to Your Macbook
Finally, you’ll need to copy the music files from the external device to your Macbook. To do this, open the external device and drag the music files from the device to your Macbook’s music library. Once the files have been copied, you can eject the external device and start listening to your music.
Transferring Music from CDs
If you have physical CDs, you can also transfer the music to your Macbook. Here’s how to do it:
Inserting the CD into the Computer
First, insert the CD into your computer’s disc drive. Once the disc has been inserted, you should see a pop-up window asking if you’d like to open the disc.
Ripping the CD to an MP3 File
Next, you’ll need to rip the CD to an MP3 file. To do this, open the disc and select the “Rip” option. This will create an MP3 file of the music on the CD.
Copying the MP3 File to Your Macbook
Finally, you’ll need to copy the MP3 file to your Macbook. To do this, connect your Macbook to your computer via USB and copy the MP3 file from your computer to your Macbook. Once the file has been copied, you can start listening to your music.
Downloading Music from Online Sources
The last method for downloading music onto your Macbook is to find music from online sources. It’s important to make sure you’re only downloading music from legal sources, as downloading music from illegal sources can result in criminal charges. Here’s how to do it:
Researching Legal Online Sources
The first step is to research legal online sources for music. Popular legal sources include Bandcamp, SoundCloud, and Amazon Music. Once you’ve found a source, you can start searching for music.
Finding Music and Downloading it to Your Computer
Once you’ve found the music you’d like to download, click the “Download” button. This will download the music to your computer.
Copying the Music File to Your Macbook
Finally, you’ll need to copy the music file from your computer to your Macbook. To do this, connect your Macbook to your computer via USB and copy the music file from your computer to your Macbook. Once the file has been copied, you can start listening to your music.
Conclusion
Downloading music onto your Macbook doesn’t have to be a difficult process. By following the steps outlined in this article, you can easily download music from the iTunes Store, streaming services, external hard drives or USB flash drives, CDs, and legal online sources. With this knowledge, you can start building your own digital music library today.
Summary of Steps
To download music onto your Macbook, you can use the iTunes Store, streaming services, external hard drives or USB flash drives, CDs, and legal online sources. For each method, there are several steps you’ll need to follow in order to successfully download the music.
Final Words of Advice
When downloading music, it’s important to make sure you’re only downloading from legal sources. Illegal downloading of music can result in criminal charges, so it’s best to avoid it. With this in mind, you can safely and easily build your own digital music library.
(Note: Is this article not meeting your expectations? Do you have knowledge or insights to share? Unlock new opportunities and expand your reach by joining our authors team. Click Registration to join us and share your expertise with our readers.)