Introduction
Evacuating a car’s air conditioning (AC) system is a critical procedure that should be done periodically. It helps to remove any moisture in the system, which can cause corrosion and other problems. It can also help to identify any potential issues with the system and make sure it is functioning properly. In this article, we will provide a comprehensive guide on how to evacuate car AC at home.
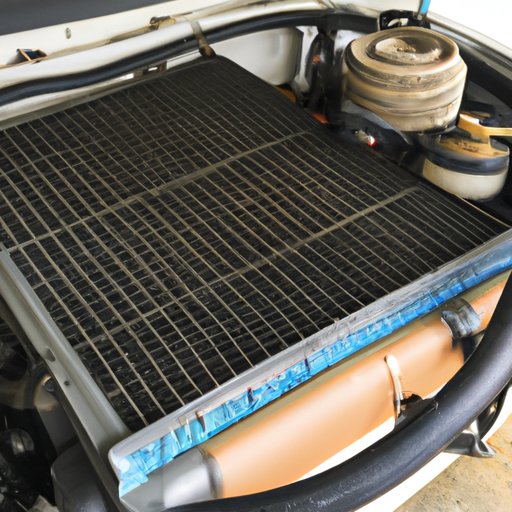
Check the Condenser for Blockage and Clear as Needed
The first step in evacuating a car’s AC system is to check the condenser for blockage. If there is a blockage, it can prevent the system from working properly. There are a few signs that indicate a blocked condenser, including a decrease in airflow, an increase in engine temperature, and strange noises coming from the compressor.
If you suspect that the condenser is blocked, there are a few steps you can take to clear the blockage. First, you should check for any debris or dirt that may have accumulated in the condenser. You can use a vacuum cleaner to remove any debris. Second, you should inspect the condenser for any cracks or damage. If the condenser is damaged, you should replace it. Finally, if the condenser is still blocked, you can try using a compressed air hose to blow out any remaining blockage.
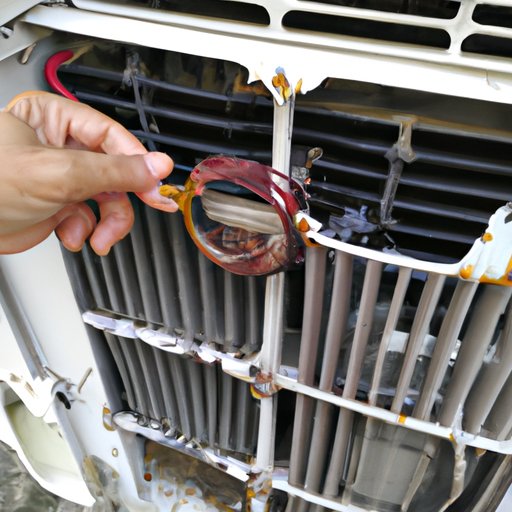
Check for a Refrigerant Leak
The next step in evacuating a car’s AC system is to check for a refrigerant leak. If there is a leak, it can reduce the efficiency of the system and prevent it from cooling properly. To inspect for a leak, you should look for any signs of oil or refrigerant around the hoses and fittings. You should also listen for any hissing sounds, which can indicate a leak. If you find any leaks, you should repair them before continuing.
To repair a leak, you will need to replace the faulty component. You should start by removing the part and cleaning it with a cloth. Next, you should apply a sealant to the area where the leak was found. Once the sealant has dried, you can re-install the part and test the system to make sure the leak has been fixed.
Inspect and Replace the Air Filter if Necessary
The next step in evacuating a car’s AC system is to inspect and replace the air filter if necessary. The air filter helps to keep contaminants out of the system and allows the AC to work more efficiently. To inspect the air filter, you should remove it and examine it for any signs of dirt, dust, or debris. If the filter is dirty, you should replace it with a new one.
To replace the air filter, you should first locate the filter holder. This is usually located near the blower motor or behind the glove box. Once you have located the filter holder, you can remove the old filter and install the new one. Make sure the filter is properly secured and then test the system to make sure it is working correctly.
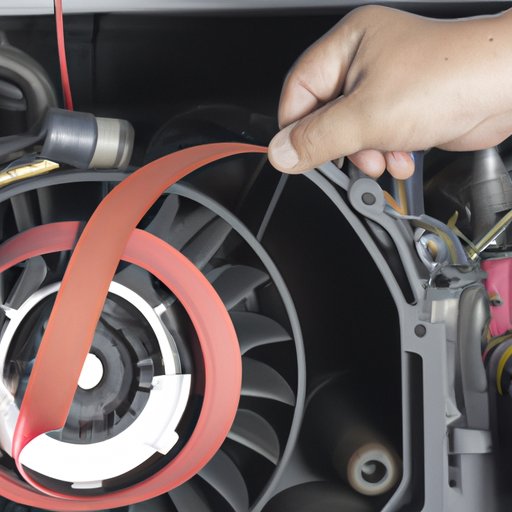
Check the Blower Motor and Fan Belt for Any Damage or Wear
The next step in evacuating a car’s AC system is to check the blower motor and fan belt for any damage or wear. The blower motor is responsible for moving the air through the system and the fan belt helps to drive the blower motor. To inspect the blower motor and fan belt, you should first turn off the engine and then remove the fan belt. Inspect the belt for any signs of cracking or fraying. If the belt is worn or damaged, you should replace it with a new one.
Next, you should inspect the blower motor for any signs of wear or damage. Look for any loose wires or connections and make sure the motor is securely attached. If the motor is damaged or worn, you should replace it with a new one.
Make Sure the Evaporator Core is Clean and Free of Debris
The next step in evacuating a car’s AC system is to make sure the evaporator core is clean and free of debris. The evaporator core helps to cool the air before it enters the cabin of the vehicle. To clean the evaporator core, you should first turn off the engine and remove the glove box. Once the glove box is removed, you should be able to access the evaporator core.
Next, you should use a soft brush to remove any dust or debris that may have accumulated in the core. You should also use a vacuum cleaner to remove any remaining dirt or dust. Once the core is clean, you should replace the glove box and test the system to make sure it is working correctly.
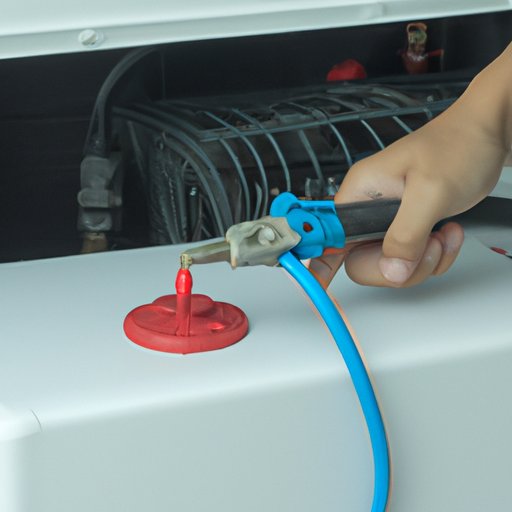
Add Refrigerant and Oil as Needed
The next step in evacuating a car’s AC system is to add refrigerant and oil as needed. Refrigerant helps to cool the air and oil helps to lubricate the components of the system. To add refrigerant, you should first purchase the correct type of refrigerant for your vehicle. Then, you should attach the refrigerant canister to the low-pressure port of the system and open the valve to allow the refrigerant to enter the system.
To add oil, you should purchase the correct type of oil for your vehicle. Then, you should attach the oil canister to the low-pressure port of the system and open the valve to allow the oil to enter the system. Once the oil and refrigerant are added, you should test the system to make sure it is working correctly.
Recharge the System with the Correct Amount of Refrigerant
The final step in evacuating a car’s AC system is to recharge the system with the correct amount of refrigerant. To do this, you should first attach the refrigerant canister to the low-pressure port of the system and open the valve to allow the refrigerant to enter the system. You should then use a pressure gauge to check the system’s pressure and adjust the amount of refrigerant accordingly.
When recharging the system, it is important to follow the manufacturer’s instructions and only use the correct type of refrigerant. Additionally, you should make sure the system is not overcharged, as this can lead to damage. Once the system is properly charged, you can test it to make sure it is working correctly.
Conclusion
Evacuating a car’s AC system is a critical procedure that should be done periodically. It helps to remove any moisture in the system, which can cause corrosion and other problems. It can also help to identify any potential issues with the system and make sure it is functioning properly. In this article, we provided a comprehensive guide on how to evacuate car AC at home, including checking the condenser for blockage, inspecting and replacing the air filter if necessary, checking the blower motor and fan belt for any damage or wear, making sure the evaporator core is clean and free of debris, adding refrigerant and oil as needed, and recharging the system with the correct amount of refrigerant.
(Note: Is this article not meeting your expectations? Do you have knowledge or insights to share? Unlock new opportunities and expand your reach by joining our authors team. Click Registration to join us and share your expertise with our readers.)