
Introduction
Replacing the string on a weed eater is an essential part of maintaining the machine. Not only will it keep the machine running smoothly, but it can also help extend its lifespan. The task may seem daunting at first, but with a few simple steps, it’s actually quite easy. In this article, we’ll walk you through everything you need to know about replacing the string on a weed eater, including a step-by-step guide, quick and easy tips, a visual guide, and more.
Overview of the Problem
The string on a weed eater is an important component of the machine. It’s responsible for cutting grass and weeds, which helps keep your lawn looking neat and tidy. Over time, however, the string will wear down and need to be replaced. If you don’t replace it in a timely manner, it can cause significant damage to the machine, resulting in costly repairs or even replacement.
Benefits of Replacing Weed Eater String
Replacing the string on a weed eater not only keeps the machine running smoothly, but it can also save you money in the long run. According to research conducted by the University of Illinois Extension, “Properly maintaining and replacing the string on a weed eater can reduce wear and tear on the machine, helping to extend its life and minimize repair costs.” Additionally, replacing the string regularly can improve the machine’s performance, making it easier to cut grass and weeds.
Step-by-Step Guide to Replacing the String on a Weed Eater
Replacing the string on a weed eater doesn’t have to be complicated. Here’s a step-by-step guide that will walk you through the process:
Gather Necessary Tools
Before you begin, make sure you have all the necessary tools on hand. You’ll need a new spool of string, a pair of scissors, and a screwdriver.
Remove Old String
Start by removing the old string from the spool. Use the screwdriver to loosen the screws and then carefully pull out the old string.
Install New String
Next, install the new string. Start by threading the new string through the eyelet on the spool. Then, wind the string around the spool until it’s full. Make sure to leave a few inches of extra string at the end.
Adjust Tension
Once the string is secure, you’ll need to adjust the tension. This will ensure the string is tight enough to cut efficiently, but not so tight that it causes damage to the machine. To adjust the tension, use the screwdriver to loosen the screws and then pull on the string until it’s taut.
Test
Finally, test the machine to make sure it’s working properly. Pull the trigger and let the machine run for a few seconds. If it works as expected, you’re good to go.
Quick and Easy Tips for Replacing Weed Eater String
Here are some quick and easy tips to keep in mind when replacing the string on a weed eater:
Choose High Quality String
It’s important to choose high quality string for your weed eater. Poor quality string can break easily and cause damage to the machine. Look for string that is strong and durable.
Avoid Over Tightening
When adjusting the tension, be careful not to over tighten the string. This can cause unnecessary wear and tear on the machine.
Keep Spare String Handy
It’s always a good idea to keep some spare string handy. That way, if you ever need to replace the string, you’ll have it on hand.
How To: Replace the String on Your Weed Eater
If you’re feeling overwhelmed by the prospect of replacing the string on your weed eater, don’t worry—it’s actually quite simple. Here’s a quick guide on how to do it:
Select the Right Size String
Start by selecting the right size string for your weed eater. Consult the user manual for the correct size.
Loosen the Spool
Next, use the screwdriver to loosen the screws on the spool. This will allow you to remove the old string.
Add the New String
Thread the new string through the eyelet and then wind it around the spool. Make sure to leave a few inches of extra string at the end.
Wind the New String
Once the string is secure, start winding it around the spool. Make sure to keep the string tight as you go.
Secure the Spool
Once the string is fully wound, use the screwdriver to tighten the screws on the spool.
Trim the Ends
Now it’s time to trim the ends of the string. Use scissors to trim off any excess string.
Test the Machine
Finally, test the machine to make sure it’s working properly. Pull the trigger and let the machine run for a few seconds. If it works as expected, you’re good to go.
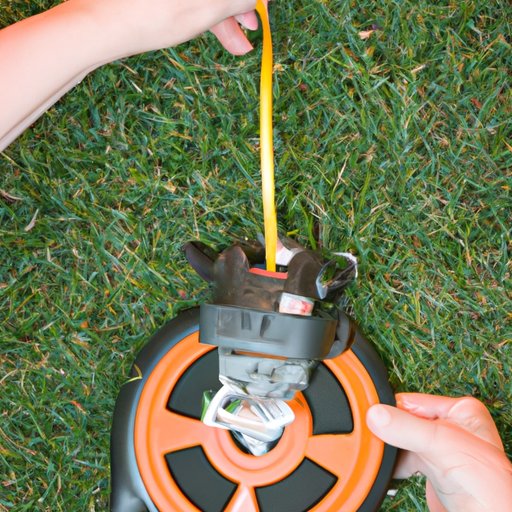
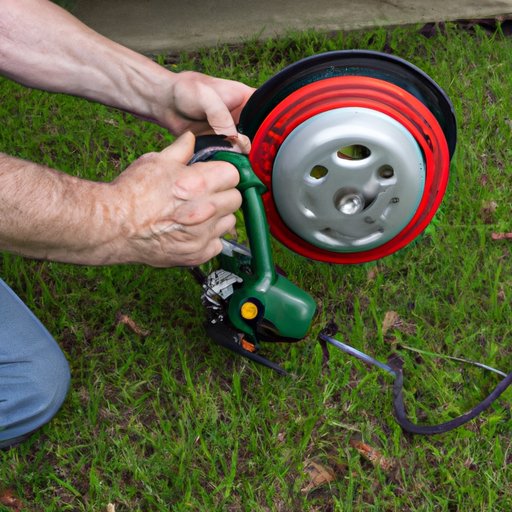
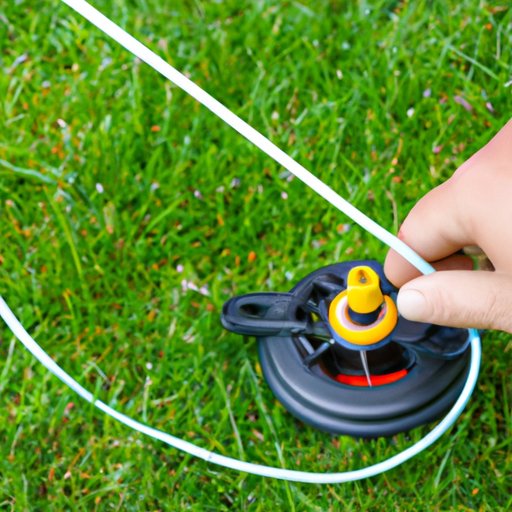
A Visual Guide to Replacing the String on a Weed Eater
Sometimes it’s helpful to have a visual guide when replacing the string on a weed eater. Here are some illustrations and photos that will help you understand each step:
DIY: Replacing Weed Eater String in 7 Simple Steps
Replacing the string on a weed eater doesn’t have to be complicated. With a few simple steps, you can do it yourself:
Step 1: Gather Supplies
Start by gathering the necessary tools: a new spool of string, a pair of scissors, and a screwdriver.
Step 2: Release Tension
Use the screwdriver to loosen the screws on the spool and then pull out the old string.
Step 3: Cut the Old String
Cut the old string with scissors and discard it.
Step 4: Load New String
Thread the new string through the eyelet and then wind it around the spool. Leave a few inches of extra string at the end.
Step 5: Re-Tighten
Use the screwdriver to re-tighten the screws on the spool.
Step 6: Trim the Ends
Trim the ends of the string with scissors.
Step 7: Test the Machine
Finally, test the machine to make sure it’s working properly. Pull the trigger and let the machine run for a few seconds. If it works as expected, you’re good to go.
How to Change the String on Your Weed Eater Without Breaking a Sweat
Replacing the string on a weed eater doesn’t have to be difficult. Here are some tips to make the process easier:
Use a String Dispenser
Using a string dispenser can help make the process much simpler. The dispenser holds the string in place while you wind it around the spool, eliminating the need to hold the string with one hand and wind with the other.
Double Check the String Length
Make sure to double check the length of the string before you start winding it. Too short and it won’t reach the spool; too long and it can get tangled up.
Utilize a Pair of Pliers
Using a pair of pliers can make tightening the screws on the spool much easier. Simply grip the screws with the pliers and turn until they’re tight.
Conclusion
Replacing the string on a weed eater is an important part of maintaining the machine. With a few simple steps and the right tools, the process is actually quite easy. We hope this article has provided you with the information you need to replace the string on your weed eater. Remember to choose high quality string, avoid over tightening, and keep spare string handy.
(Note: Is this article not meeting your expectations? Do you have knowledge or insights to share? Unlock new opportunities and expand your reach by joining our authors team. Click Registration to join us and share your expertise with our readers.)