Introduction
The Litter Robot is a self-cleaning litter box designed to make cleaning up after your cat easier. It uses an automated system to sift through the litter, separate out waste, and deposit it into a waste drawer. However, if your Litter Robot isn’t cycling properly, you may be wondering what could be causing the issue.
In this article, we’ll explore potential causes of a non-cycling Litter Robot, as well as provide troubleshooting tips and advice on how to maintain your Litter Robot for optimal performance. Read on to learn more about why your Litter Robot might not be cycling and how to fix it.

Troubleshooting Common Problems with the Litter Robot
If your Litter Robot isn’t cycling, there are several potential causes that you should investigate. Before attempting to reset or re-calibrate your Litter Robot, try the following troubleshooting steps:
Check the Power Source
The first step is to check the power source. Make sure the power cord is securely plugged into the wall outlet and the Litter Robot itself. If the plug is loose or the power cord is damaged, it may be causing the Litter Robot to malfunction.
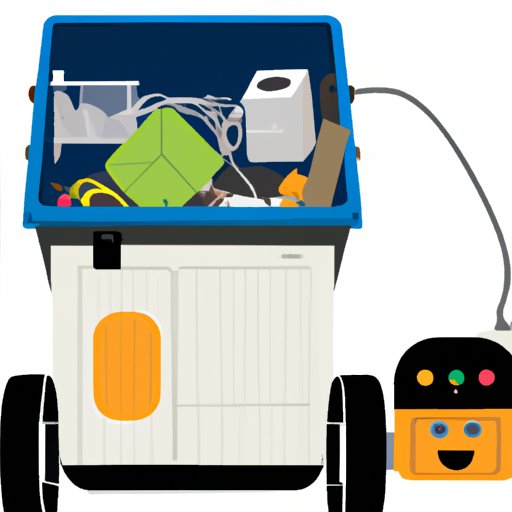
Clean and Empty the Waste Drawer
It’s also important to regularly clean and empty the waste drawer. If the waste drawer is full or clogged, it can interfere with the Litter Robot’s ability to cycle properly. Also, be sure to replace the filter in the waste drawer regularly.
Reset the Litter Robot
If the above steps don’t resolve the issue, you should try resetting the Litter Robot. To do this, unplug the power cord from the wall outlet and Litter Robot, wait 10 seconds, then plug the power cord back in. This should reset the Litter Robot and allow it to cycle properly.
Exploring the Causes of a Non-Cycling Litter Robot
If the above steps don’t resolve the issue, there may be other underlying causes that need to be addressed. Here are some of the most common causes of a non-cycling Litter Robot:
Malfunctioning Sensors
One possible cause of a non-cycling Litter Robot is malfunctioning sensors. According to a study conducted by the University of Minnesota, “the Litter Robot’s sensors can become clogged with dust or debris, which can cause them to malfunction and prevent the Litter Robot from cycling properly.”
Overloaded Waste Drawer
Another potential cause of a non-cycling Litter Robot is an overloaded waste drawer. The waste drawer should be emptied regularly to ensure that the Litter Robot can cycle properly. If the waste drawer is too full or clogged, it can interfere with the Litter Robot’s ability to cycle.
Low Battery
Finally, a low battery can also cause the Litter Robot to malfunction. If the battery is low, the Litter Robot may not have enough power to complete a full cycle. If this is the case, you should charge the battery or replace it as needed.
How to Reset and Re-Calibrate Your Litter Robot
If you’ve identified one of the above causes for your Litter Robot’s non-cycling issue, you may need to reset and re-calibrate the unit. Here’s a step-by-step guide to help you through the process:
Step-by-Step Guide to Resetting the Litter Robot
1. Unplug the power cord from the wall outlet and the Litter Robot.
2. Wait 10 seconds.
3. Plug the power cord back in.
4. Press and hold the “reset” button on the top of the Litter Robot for 10 seconds.
How to Re-Calibrate the Litter Robot
1. Unplug the power cord from the wall outlet and the Litter Robot.
2. Wait 10 seconds.
3. Plug the power cord back in.
4. Press and hold the “calibrate” button on the top of the Litter Robot for 10 seconds.
5. Place a heavy object (such as a book) in the waste drawer to act as a weight.
6. Press and hold the “calibrate” button on the top of the Litter Robot for 10 seconds.
Diagnosing Mechanical Issues with the Litter Robot
If the above steps don’t resolve the issue, there may be an underlying mechanical problem with the Litter Robot that needs to be addressed. To diagnose the issue, try the following steps:
Identifying Mechanical Problems
First, inspect the Litter Robot for any signs of damage or wear and tear. Check the motor, drive belt, and other moving parts for signs of damage or excessive wear. If any of these components are damaged or worn, they should be replaced as soon as possible.
Replacing Parts as Needed
If any parts are damaged or worn, you should replace them as soon as possible. Be sure to use genuine Litter Robot replacement parts for optimal performance. You can find original replacement parts on the Litter Robot website or from your local pet store.

Tips for Maintaining Your Litter Robot for Optimal Performance
Once you’ve solved the issue with your Litter Robot, it’s important to take steps to ensure that it continues to perform optimally. Here are some tips for maintaining your Litter Robot:
Regularly Clean and Empty the Waste Drawer
It’s important to regularly clean and empty the waste drawer to ensure that the Litter Robot is able to cycle properly. Be sure to replace the filter in the waste drawer regularly as well.
Replace Filters and Bags as Necessary
You should also replace the filters and waste bags as necessary. These components should be replaced every few months to ensure optimal performance.
Monitor Battery Levels
Finally, it’s important to monitor the battery levels of your Litter Robot. If the battery runs low, it can interfere with the Litter Robot’s ability to cycle properly. Be sure to recharge or replace the battery as needed.
Conclusion
If your Litter Robot is not cycling properly, there are several potential causes that you should investigate. From malfunctioning sensors to an overloaded waste drawer, there are several potential issues that can interfere with the Litter Robot’s performance. To ensure that your Litter Robot performs optimally, it’s important to regularly clean and empty the waste drawer, replace filters and bags as needed, and monitor battery levels. With proper maintenance and troubleshooting, you can keep your Litter Robot cycling properly.
(Note: Is this article not meeting your expectations? Do you have knowledge or insights to share? Unlock new opportunities and expand your reach by joining our authors team. Click Registration to join us and share your expertise with our readers.)